1-Studio

How to Record Foley like a PRO (4 Steps)

How to Record Foley like a PRO (4 Steps)

First of all if you don’t remember what foley was and you need to take a peek, do it here. In here I cover what foley is and where in the process of audio post-production lies exactly.

Well, let’s suppose you are about to begin the foley process of your film and it’s the first time you go around it and you don’t know where o start. Ok, don’t stress out, in here you will find a pretty decent guide on how to start as soon as you finish reading this post.

Step 1

Get your equipo together.

What you will need essentially is:

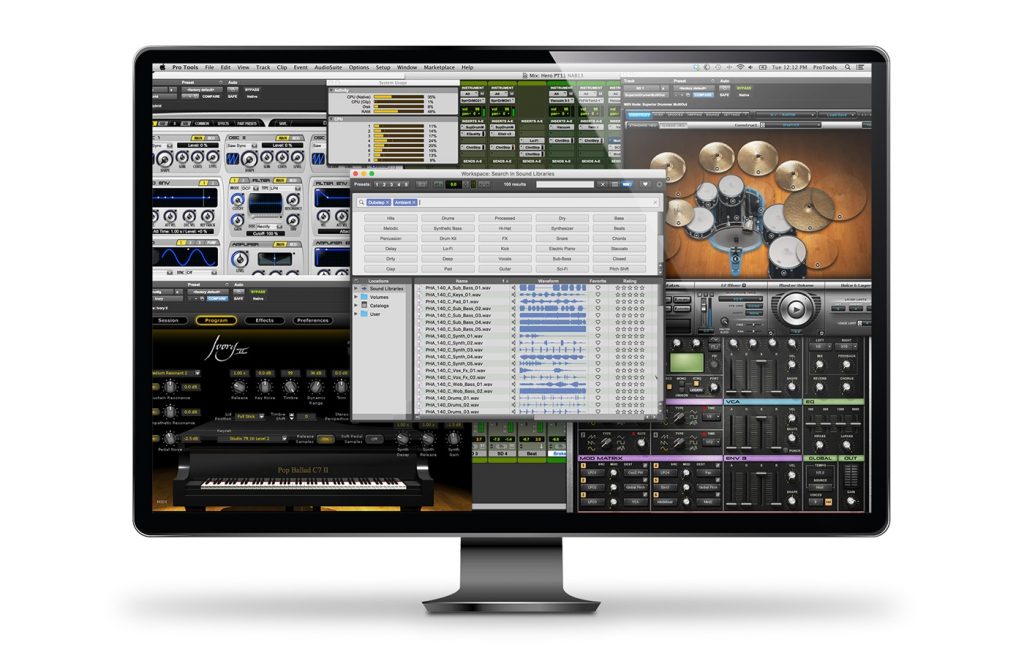
  • A PC that is capable of running smoothly Pro Tools or any other sound editing software. This is essential when doing foley as you will be playing the movie and recording simultaneously.
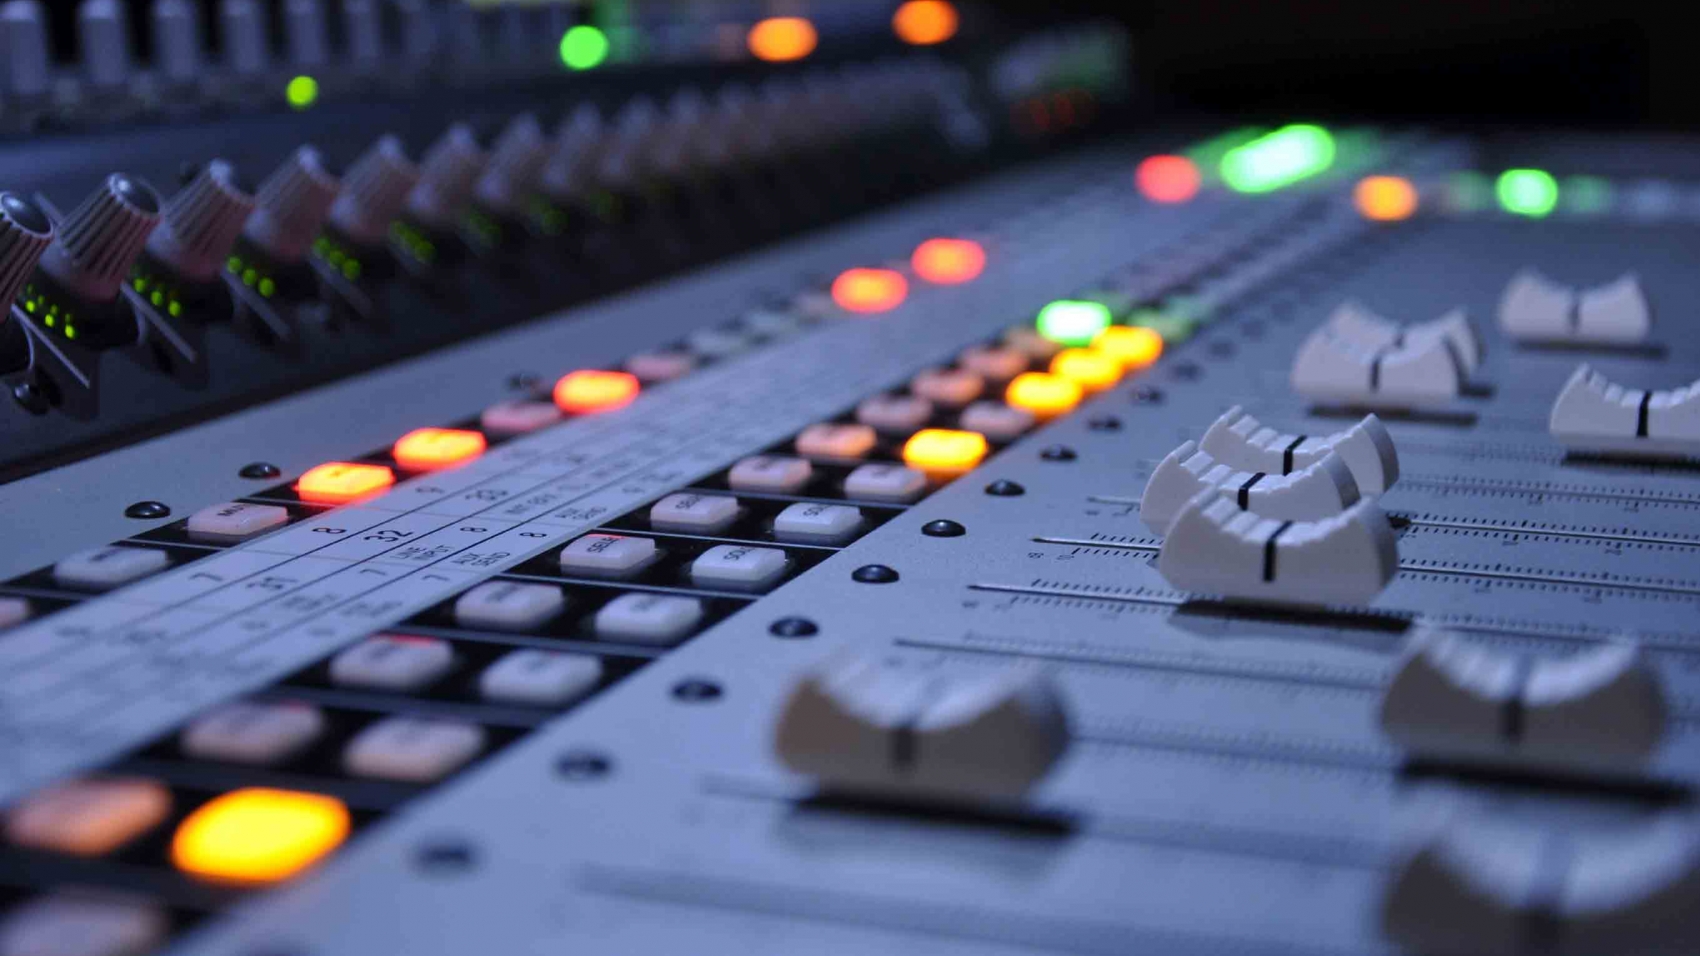
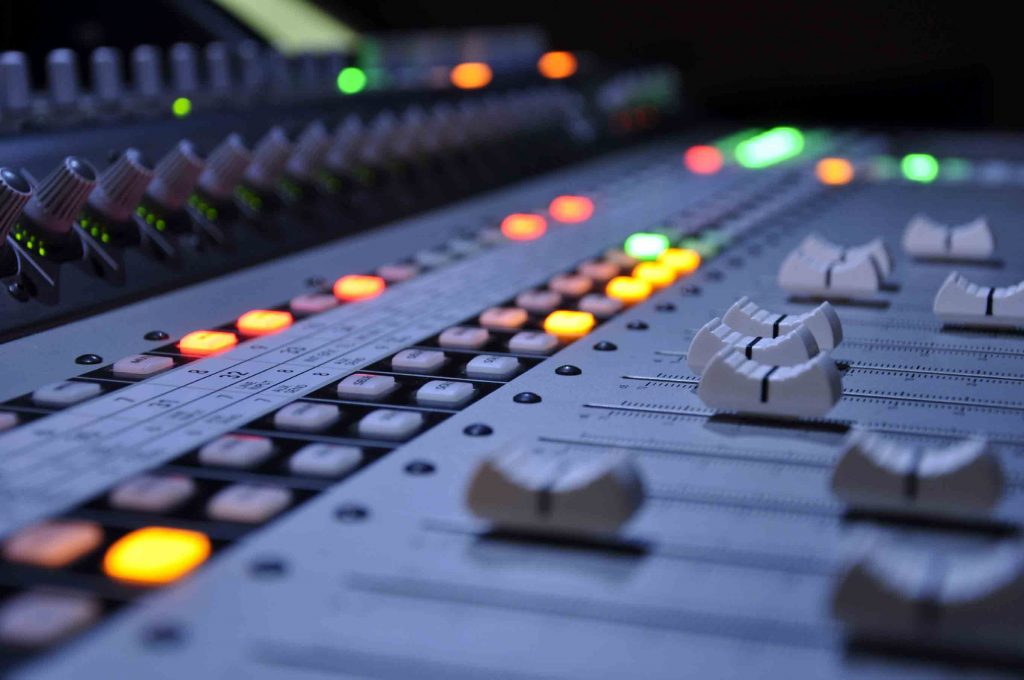
  • A mixing table or a pre amp that is connected to your PC. You will control through this device the amount of gain your output signal is carrying.
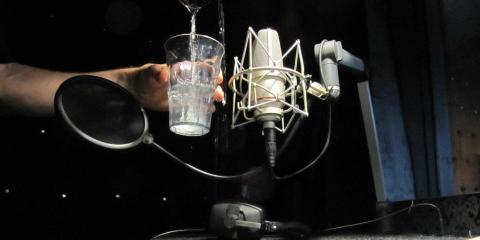
  • An XLR cable. This will connect your mixing table/preamp to your mic.
  • A microphone. For this specific case of recording foley, that means recording extra audio for the already recorded audio on set, what you really want is that the audio that you are recording on the post-production phase resembles as closely as possible the audio that the boom operator picked up on set. This way you prevent the audio from post differ too much to the sound of the dialogue tracks recorded on set.
  • A mic stand. This is pretty cheap and you can find easily on the internet.

I leave you here the link to the mic stand, the mic, the mixing table and every piece of gear we used for the film DOPPEL. But the more you can expend in better gear, the better.

Step 2

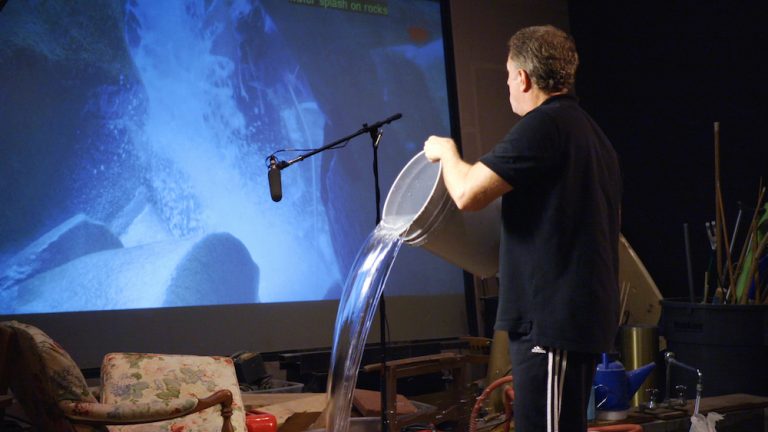
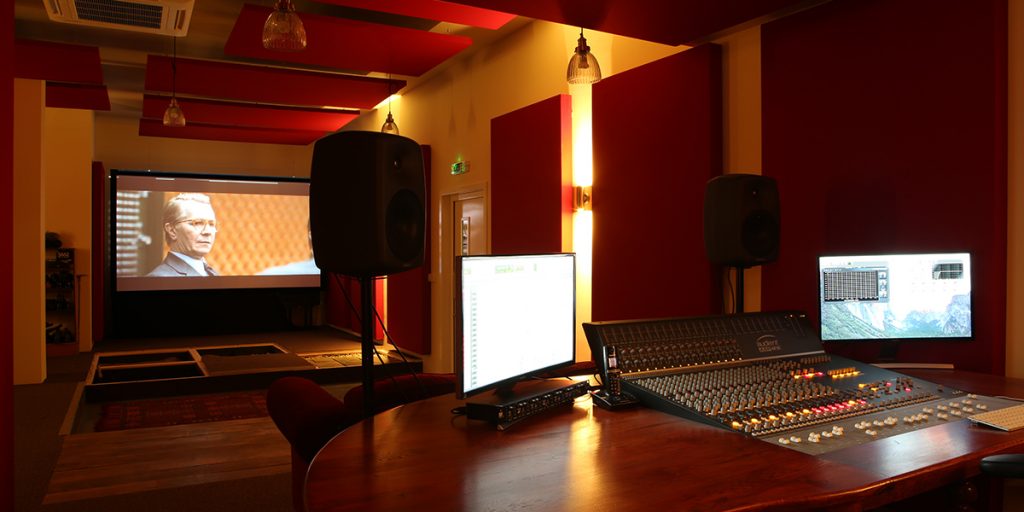
Find a safe acoustic environment in where you will create all the sounds for foley.

You have essentially two basic options when it comes to this point:

  • Find someone that is willing to offer you that already treated space. (This is least likely option)
  • Create a safe acoustic environment that will become your new foley studio. For that it’s key that you have an understanding of how sound waves propagate and try to kill any sound reflections coming from the walls of the room you want to do the foley process.

This is a video in which I cover how you can create your own home studio.

Step 3

Get your Pro Tools session ready.

For that I here leave you guys a video that covers all the steps necessary from having an inexistent organisation to being organised like PRO inside your new Pro Tools session.

Step 4

Record your sounds for each and every object/prop, movement and footsteps of your characters for your movie.

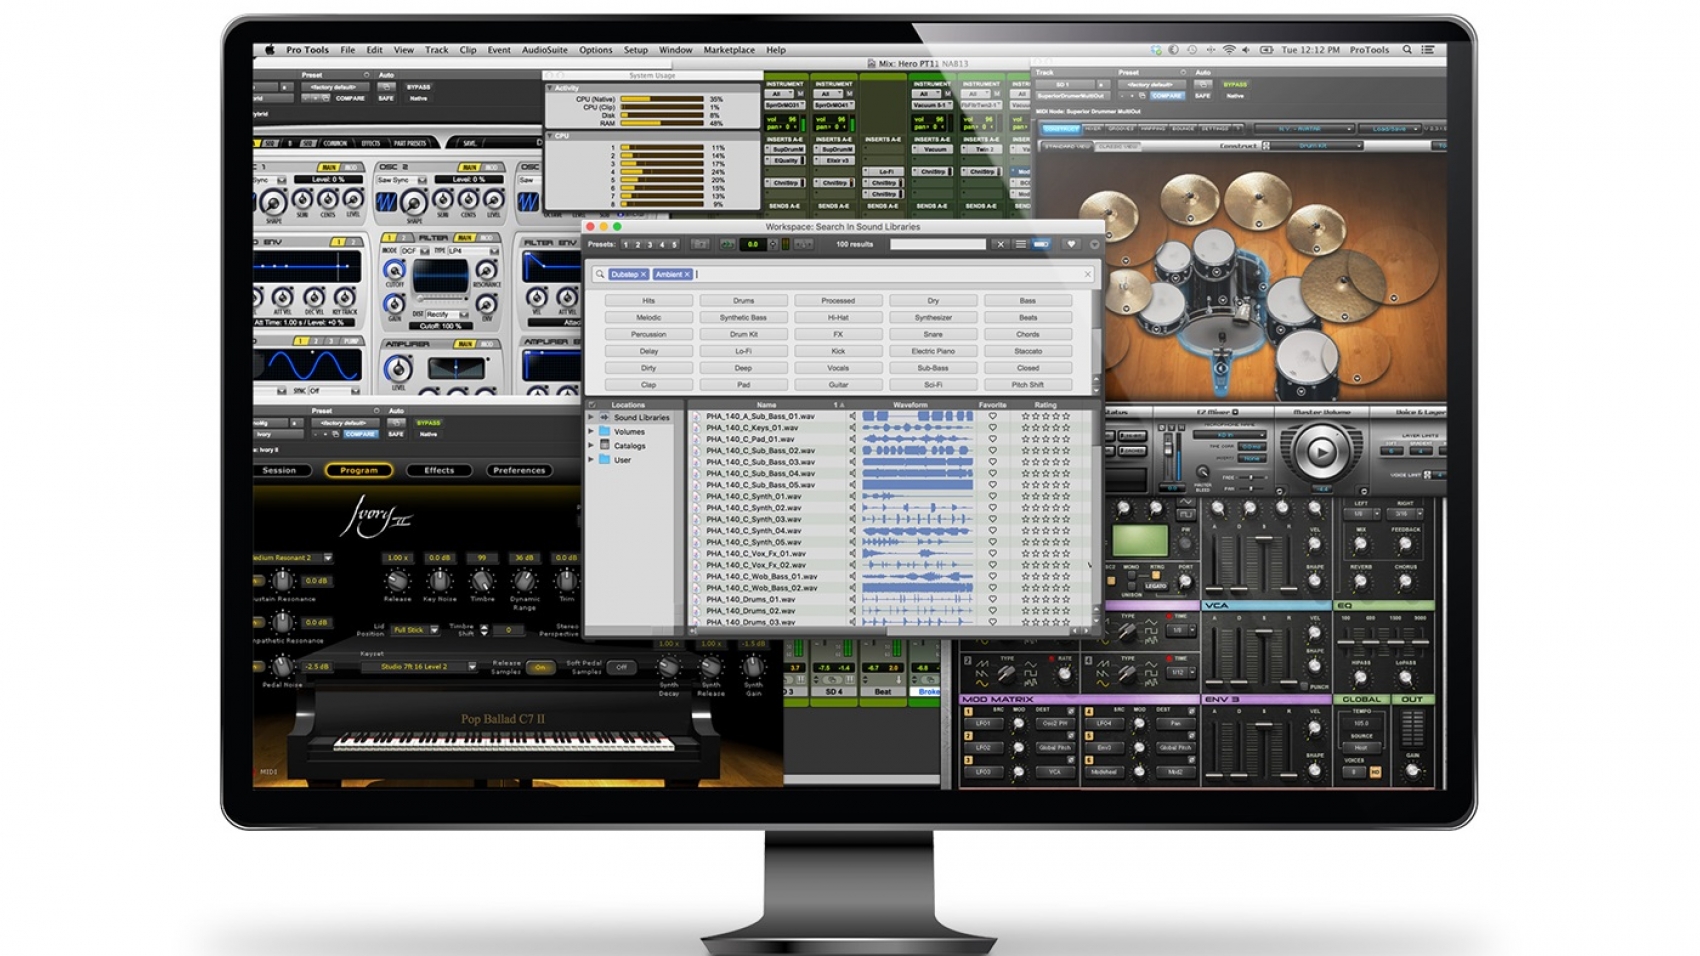
In Pro Tools it’s dead easy to record sounds for foley for your film.

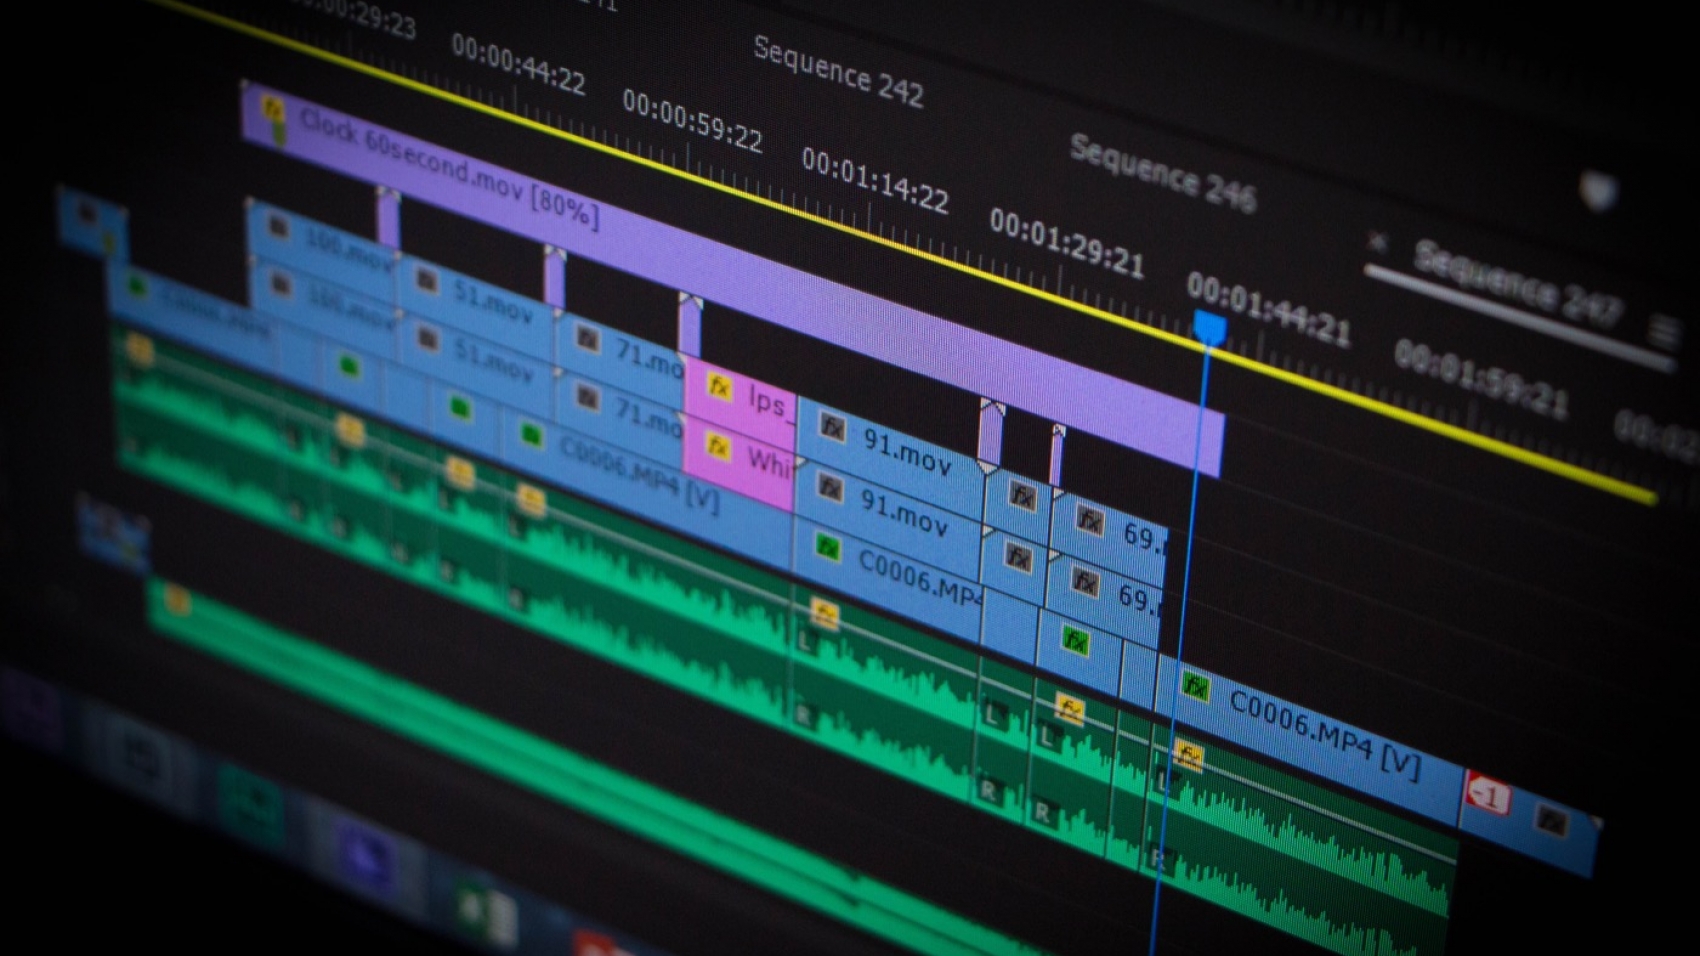
You just need to import your video to the new session you’ve created inside Pro Tools and hit the recording button on the track you want to record and hit the recording button sitting on top of your timeline in Pro Tools.

Here there is a visual explanation of what I am talking about…

https://youtu.be/ksiKKmgJpkIhttps://youtu.be/LK_b2sqsdK0

Things to take into consideration before hitting the record button: how to set your gain for recording and knowing when to apply effects to your audio clips.

How to set your gain for recording it’s dead easy but difficult to guess if you are not really into audio.

Here I leave you guys a post in which I talk about how to set your gain for recording.

In short, what you want is for your output signal to be around -12dB (peaking), that way you have enough room for the audio not to peak at 0dB. You don’t want to set your gain to high because you will get distorsion. And neither you want to set your gain too low because you will get pink noise coming in from your mixer and your mic (from almost any device that it’s standing between the sound you want record and your PC.

There are many videos on the web on how to apply effects to your clips but the golden rule for audio is: “the less you touch, the better”.

But if you are compelled to applying effects to your audio clips I strongly recommend that you get a high fidelity audio system (may that be a really good pair of headphones or two awesome speakers). Either way, before applying any effects you need to know that your audio system is giving you a completely flat response and it’s not colouring your bases or your highs.

If you want more information on how to cope with the audio post-production process here I leave you a link to my personal post-production playlist of youtube where you will find everything discussed above and tons of useful information. Also, in here you will find professional foley artists and audio engineers recording sounds for feature length films and series! 

Hope this was useful and see you guys next time!

PLAYLIST POST by ALE FITO


1-Studio

How to Record Foley like a PRO (4 Steps)

Ale Fito POSTPRODUCTION , , , Leave a Comment on How to Record Foley like a PRO (4 Steps)

How to Record Foley like a PRO (4 Steps) First of all if you don’t remember what foley was and you need to take a peek, do it here. In here I cover what foley is and where in the process of audio post-production lies exactly. Well, let’s suppose you are about to begin the […]


PrettyLIghts

Post-Production Audio: What ORDER to follow? (Step by Step Guide)​

Ale Fito POSTPRODUCTION , , , Leave a Comment on Post-Production Audio: What ORDER to follow? (Step by Step Guide)​

Post-Production Audio: What ORDER to follow? (Step by Step Guide) One of the most important things when planifying the post process of a feature film is what ORDER is the most efficient to follow of them all. In here we will talk about which is the most common order for audio post-production: Dialogue editing ADR […]


premiere-audio-screen

Sync Dialogue in Premiere Pro and export AAF to Pro Tools (3 STEPS)

Ale Fito POSTPRODUCTION , Leave a Comment on Sync Dialogue in Premiere Pro and export AAF to Pro Tools (3 STEPS)

Sync Dialogue in Premiere Pro and export AAF to Pro Tools (3 STEPS) The key question here is: You have finished shooting your short, documentary or feature film and you have as well already edited your film but only the visual part (if this is the way you come around it). Now you would like […]


ProTools_Overview_Main

ProTools Editing Principles for Filmmaking

Ale Fito POSTPRODUCTION , , Leave a Comment on ProTools Editing Principles for Filmmaking

ProTools Editing Principles for Filmmaking Pro Tools 12.5 Here I leave you a list of the key principles you will use when editing and mixing sound for film, therefore and without further delay here it is…  Quick Steps when Creating a New Session: Step 1: NAME THE TRACK (SET A MASTER FADER FIRST WHEN CREATING […]


deadpool

Edit your feature film in ONE vs SEVERAL Premiere Pro projects

Ale Fito POSTPRODUCTION Leave a Comment on Edit your feature film in ONE vs SEVERAL Premiere Pro projects

Edit your feature film in ONE vs SEVERAL Premiere Pro projects When it comes to editing a YouTube video it’s clear. You would do only one Premiere project where you would edit the whole thing as it is a 10 minute video. But what if that video wasn’t a YouTube video and instead it was […]


image-w1280

Why the Director Should Be the Editor of the Film

Ale Fito POSTPRODUCTION Leave a Comment on Why the Director Should Be the Editor of the Film

Why the Director Should Be the Editor of the Film Sean Baker. The Florida Project. David Lean. In which we serve. A passage to India (Oscar nomination for editing) David Lynch (2 features). Eraserhead. Inland empire. Shane Carruth (2 features). Primer. Upstream Color. The Coen Brothers (14 features). They have edited all of their films […]


PrettyLIghts

Post-Production Audio: What ORDER to follow? (Step by Step Guide)​

Post-Production Audio: What ORDER to follow? (Step by Step Guide)

One of the most important things when planifying the post process of a feature film is what ORDER is the most efficient to follow of them all.

In here we will talk about which is the most common order for audio post-production:

  • Dialogue editing
  • ADR (Automated Dialogue Recording)
  • Sound Design
  • Foley
  • Music composition and editing
  • Mixing

Dialogue Editing

At this stage, what you want to do is edit your whole project in Premiere Pro or whatever video editing software you have at your disposal, sync the good audiio to the good takes and move on with the process of audio editing in a more specialised software than Premiere like Pro Tools or Audition.

If you have trouble with how to cope with this stage of the process and making the transition from Premiere to Pro Tools, check out this post where I cover in depth how to do just that!

ADR

ADR stands for Automated Dialogue Recording.

It makes reference to all of the pieces of dialogue that have to be recorded in a safe acoustic environment like a sound studio where actors come and perform their lines that the boom operator didn’t really take on set. This includes all of the lines of dialogue that are messed up ambient noise like a car passing by or a truck.

As well, all of the audio clips of audio recorders, radios, speakers or whatever device that was supposed to be playing on set and wasn’t so as not spoil the dialogue recording of the characters, all of these dialogue audio clips will be recorded in the same safe acoustic environment described before. Later you will make them sound as if they were coming from a speaker in the mixing stage.

Sound Design

This is the sound process of creating audio effects for the picture.

The Person in charge of this stage is the sound designer, who will record all of the wild tracks, background noises of the picture and any special sound effects.

At this stage what the sound designer will record on field, will do heavy processing of that audio and add electronic synthesis (all of this if needed).

Foley

At this stage the audio engineer (at the mixing table) and the foley artist (in a safe acoustic environment, probably a foley studio) they both will create all of the sounds of the picture that the directional mic (the boompole) didn’t get because it was focused on picking up the dialogue on set.

These types of sounds include:

  • Objects / Props: (From a sword to a phone) essentially every object inside the scene that our character picks up or interacts with in someway.
  • Movement: typically the movement of the character’s clothes (these include trousers, jackets, pulls, etc.)
  • Steps: every character has a different pair of shoes, different height, and different weight, therefore their steps should be different from one another.

All of the sounds above described are afterwards synched with the picture so that they are BANGING SYNCHED! This is often achieved by replicating the movement and actions of the characters as well as possible and afterwards the audio engineer will cut and edit these audio clips in a program like Pro Tools so that it is actually banging synched.

Here I leave you guys a video in which you see the foley process of a professional foley studio, step by step for the “Night Manager”

VIDEO: FOLEY PROCESS FROM FEET FIRST FOLEY STUDIO

https://youtu.be/nZbCY-PrH5Q

Music Composition and Editing

For each movie or project this process will be different.

For instance, Hans Zimmer will need an orchestra and a very expensive hall for the orchestra to play in and record the drums of the “Dark Knight”. Others like Vangelis will only need a more or less safe acoustic room where he can compose and edit the synthetic music (that goes straight to his computer) to create the original soundtrack of “Blade Runner”.

So it depends on what kind of instruments you want to include in your soundtrack and the implications of each choice (if they are acoustic or synthetic instruments)…

I strongly recommend to investigate first which are the instruments that fit best your project and what budget you have in mind.

(DISCLAIMER: Most free pluggins for orchestral sounds for Pro Tools or any other audio software are trash. You will need to PAY if you want to include a VST pluggin for strings)

Mixing

All audio is then mixed!

This means balanced.

At this stage you set the appropriate volume of each track and audio clip and EQ if needed. Then you have master volume controls that allow you to set the overall volume of the dialogue tracks, the foley tracks, the music and background noise…

Mixing is an extensive topic that we cover in a seperate post that you will find in the POST category of the BLOG page.

IN FACT, IF YOU WANT TO KNOW MORE ABOUT ANY OF THESE STAGES OF AUDIO POST PRODUCTION, WE COVER EVERY BIT OF THE PROCESS IN THE “POST” CATEGORY.

GO AHEAD AND CHECK IT OUT!

Hope all of this information was useful to you and see you next time!


1-Studio

How to Record Foley like a PRO (4 Steps)

Ale Fito POSTPRODUCTION , , , Leave a Comment on How to Record Foley like a PRO (4 Steps)

How to Record Foley like a PRO (4 Steps) First of all if you don’t remember what foley was and you need to take a peek, do it here. In here I cover what foley is and where in the process of audio post-production lies exactly. Well, let’s suppose you are about to begin the […]


PrettyLIghts

Post-Production Audio: What ORDER to follow? (Step by Step Guide)​

Ale Fito POSTPRODUCTION , , , Leave a Comment on Post-Production Audio: What ORDER to follow? (Step by Step Guide)​

Post-Production Audio: What ORDER to follow? (Step by Step Guide) One of the most important things when planifying the post process of a feature film is what ORDER is the most efficient to follow of them all. In here we will talk about which is the most common order for audio post-production: Dialogue editing ADR […]


premiere-audio-screen

Sync Dialogue in Premiere Pro and export AAF to Pro Tools (3 STEPS)

Ale Fito POSTPRODUCTION , Leave a Comment on Sync Dialogue in Premiere Pro and export AAF to Pro Tools (3 STEPS)

Sync Dialogue in Premiere Pro and export AAF to Pro Tools (3 STEPS) The key question here is: You have finished shooting your short, documentary or feature film and you have as well already edited your film but only the visual part (if this is the way you come around it). Now you would like […]


ProTools_Overview_Main

ProTools Editing Principles for Filmmaking

Ale Fito POSTPRODUCTION , , Leave a Comment on ProTools Editing Principles for Filmmaking

ProTools Editing Principles for Filmmaking Pro Tools 12.5 Here I leave you a list of the key principles you will use when editing and mixing sound for film, therefore and without further delay here it is…  Quick Steps when Creating a New Session: Step 1: NAME THE TRACK (SET A MASTER FADER FIRST WHEN CREATING […]


deadpool

Edit your feature film in ONE vs SEVERAL Premiere Pro projects

Ale Fito POSTPRODUCTION Leave a Comment on Edit your feature film in ONE vs SEVERAL Premiere Pro projects

Edit your feature film in ONE vs SEVERAL Premiere Pro projects When it comes to editing a YouTube video it’s clear. You would do only one Premiere project where you would edit the whole thing as it is a 10 minute video. But what if that video wasn’t a YouTube video and instead it was […]


image-w1280

Why the Director Should Be the Editor of the Film

Ale Fito POSTPRODUCTION Leave a Comment on Why the Director Should Be the Editor of the Film

Why the Director Should Be the Editor of the Film Sean Baker. The Florida Project. David Lean. In which we serve. A passage to India (Oscar nomination for editing) David Lynch (2 features). Eraserhead. Inland empire. Shane Carruth (2 features). Primer. Upstream Color. The Coen Brothers (14 features). They have edited all of their films […]


premiere-audio-screen

Sync Dialogue in Premiere Pro and export AAF to Pro Tools (3 STEPS)

Sync Dialogue in Premiere Pro and export AAF to Pro Tools (3 STEPS)

The key question here is:

You have finished shooting your short, documentary or feature film and you have as well already edited your film but only the visual part (if this is the way you come around it). Now you would like to continue with the process of post-production that include (in the following order):

  • Dialogue editing
  • ADR (Automated Dialogue Recording)
  • Sound Design
  • Foley
  • Music composition and editing
  • Mixing

If you want to know more about the order of audio post-production, check out this post.

BUT,

The problem that you now face is that you have recorded all of of your audio in an separate external recorder so that you get cleaner audio than if you had recorded everything through the built in mic of your camera.

SO

what you need to do it’s easy: SYNC AUDIO AND VIDEO.

BUT then again, where do you do it and how if you know that all of the audio post-production stages you will do them in a separate and specialised audio software like Pro Tools or Adobe Audition?

Well, there is something that will literally will save your life so don’t stress out.

There is a little thing called AAF files (Advanced Authoring Format) that enable you to export all of your already synchronised audio from your Premiere Pro project to your new Pro Tools project!

Let’s cover all the process step by step so that there is no confusion on the subject matter.

Step 1

You have the visual part of your film already edited with the audio that  the camera picked up on set that is automatically linked to your image. Meaning, you have already chosen the best take (visual) and therefore you have implicitly already chosen the audio file from your external recorder that comes with that particular image.

Now you want to sync all the audio files that correspond to the good takes you have on your timeline, the clips that make up your short, documentary or film.

For that, on your Premiere Pro project you will need to either open a new sequence or in the same timeline that you are working on select both your audio file and the clip that you know that audio belongs to and right click and select merge clips or synchronize.

Both options are suitable for the case but there is a slight difference: merge clips will create a brand new clip where the image will be synchronized with the audio clip selected and with synchronize clips you will have all of the 3 elements still there and synchronized (the image of the clip, the reference audio that picked up the camera when you hit the recording. Button and the audio clip from your external recorder).

Here I leave you guys a video that explains it much better visually:

VIDEO: MERGE CLIPS & SYNC
SHORT EXPLANATION

https://youtu.be/wo1n_WPxOL0

LONG EXPLANATION

https://youtu.be/Gy4MSxZZJRE

The option you choose depends on how you will like to work. If you want to have a cleaner timeline select merge clips and if you want to keep all of your original audio clips separate choose synchronize.

(DISCLAIMER: If you have an old version of Premiere you may not have the synchronize option)

YOU WILL NEED TO REPEAT THE PROCESS DESCRIBED ABOVE THROUGHOUT YOUR WHOLE TIMELINE UNTIL YOU HAVE ALL OF YOUR GOOD AUDIO IN SYNC WITH EVERY CLIP OF YOUR PROJECT.

Step 2

You will need to export your Premiere Pro project to an AAF file.

This is just a file so that Pro Tools can read all of your audio tracks in sync with the picture and place all of your audio tracks in the exact place where they belong in your timeline.

This video explains PERFECTLY the process so I won’t bother you with the written explanation.

VIDEO: EXPORT AAF FILE FROM PREMIERE PRO

https://youtu.be/KrB4I_ioCHU

Step 3

Import the AAF file to your Pro Tools session.

Same as before, here I leave you a GREAT video that explains the process of importing an AAF file to your Pro Tools session.

VIDEO: IMPORT AAF TO PRO TOOLS

https://youtu.be/Nym_LDuoMbU

YOU HEVE FINISHED THE PROCESS!

If you want to know more of why you would want to export an AAF file instead of an OMF file, here I leave you guys a video that covers why AAF files are awesome!

VIDEO: DIFFERENCES BETWEEN AAF & OMF FILES

https://youtu.be/pzhmnTxwQmI


1-Studio

How to Record Foley like a PRO (4 Steps)

Ale Fito POSTPRODUCTION , , , Leave a Comment on How to Record Foley like a PRO (4 Steps)

How to Record Foley like a PRO (4 Steps) First of all if you don’t remember what foley was and you need to take a peek, do it here. In here I cover what foley is and where in the process of audio post-production lies exactly. Well, let’s suppose you are about to begin the […]


PrettyLIghts

Post-Production Audio: What ORDER to follow? (Step by Step Guide)​

Ale Fito POSTPRODUCTION , , , Leave a Comment on Post-Production Audio: What ORDER to follow? (Step by Step Guide)​

Post-Production Audio: What ORDER to follow? (Step by Step Guide) One of the most important things when planifying the post process of a feature film is what ORDER is the most efficient to follow of them all. In here we will talk about which is the most common order for audio post-production: Dialogue editing ADR […]


premiere-audio-screen

Sync Dialogue in Premiere Pro and export AAF to Pro Tools (3 STEPS)

Ale Fito POSTPRODUCTION , Leave a Comment on Sync Dialogue in Premiere Pro and export AAF to Pro Tools (3 STEPS)

Sync Dialogue in Premiere Pro and export AAF to Pro Tools (3 STEPS) The key question here is: You have finished shooting your short, documentary or feature film and you have as well already edited your film but only the visual part (if this is the way you come around it). Now you would like […]


ProTools_Overview_Main

ProTools Editing Principles for Filmmaking

Ale Fito POSTPRODUCTION , , Leave a Comment on ProTools Editing Principles for Filmmaking

ProTools Editing Principles for Filmmaking Pro Tools 12.5 Here I leave you a list of the key principles you will use when editing and mixing sound for film, therefore and without further delay here it is…  Quick Steps when Creating a New Session: Step 1: NAME THE TRACK (SET A MASTER FADER FIRST WHEN CREATING […]


deadpool

Edit your feature film in ONE vs SEVERAL Premiere Pro projects

Ale Fito POSTPRODUCTION Leave a Comment on Edit your feature film in ONE vs SEVERAL Premiere Pro projects

Edit your feature film in ONE vs SEVERAL Premiere Pro projects When it comes to editing a YouTube video it’s clear. You would do only one Premiere project where you would edit the whole thing as it is a 10 minute video. But what if that video wasn’t a YouTube video and instead it was […]


image-w1280

Why the Director Should Be the Editor of the Film

Ale Fito POSTPRODUCTION Leave a Comment on Why the Director Should Be the Editor of the Film

Why the Director Should Be the Editor of the Film Sean Baker. The Florida Project. David Lean. In which we serve. A passage to India (Oscar nomination for editing) David Lynch (2 features). Eraserhead. Inland empire. Shane Carruth (2 features). Primer. Upstream Color. The Coen Brothers (14 features). They have edited all of their films […]


ProTools_Overview_Main

ProTools Editing Principles for Filmmaking

ProTools Editing Principles for Filmmaking

Pro Tools 12.5

Here I leave you a list of the key principles you will use when editing and mixing sound for film, therefore and without further delay here it is… 

Quick Steps when Creating a New Session:
  • Step 1: NAME THE TRACK (SET A MASTER FADER FIRST WHEN CREATING NEW PROJECT = Track – New – Stereo – Master Fader)
  • Step 2: SET A COLOR (Same color for same types of sounds)
  • Step 3: RECORD AUDIO (Mono = record with 1 mic // Stereo = record with 2 mics)
Types of tracks:
  • Audio tracks: mono/stereo
  • Auxiliary tracks (aux): no audio files here, only effects, pan and fader. You channel several audio tracks to an aux track so change the effect of all and each one of the tracks that are channeled through that specific aux track. When channelling other tracks it has 2 faders if stereo.
  • Midi track: virtual piano. You need to redirect the midi information to another track so you actually hear a piano (virtual). It doesn’t play/you don’t hear midi information.
  • Master fader: you fade or increase volume of all other type of tracks. -6dB is ok for music. -12dB for film?

Also, you can create all of these in Track – New – …

Tools:
  • Selection tool: Ctrl + { // } = Zoom in // out. Arrow right to go to the right side of selection and vice versa.
  • Grabber tool
  • Trim tool
  • All above: click in grey area above the tools above to activate all three
Modes of editing:
  • Slip mode: move cursor however you want
  • Grid mode: the cursor is inside a grid where you move clips.
  • Shuffle mode: as if you magnetized the right side of the clips (Première Ctrl + trim)
  • Spot mode: for mixing sound. When you click with the grab tool a window will come up where you can type in the specific time from which you want the clip to start playing.
SET Loudness: 

(https://www.pro-tools-expert.com/home-page/2017/6/21/loudness-and-dynamics-in-cinema-sound)

“The average level of a movie should normally be approximately 6 dB below that, in film work, using digital audio, it was generally agreed that dialogue levels were consistently running 30 dB below full scale, giving film audio 30 dB of “emotional” headroom. Dialog is therefore 7 to 9 dB below the reference level. This would be equivalent to app. 76 dBA.

My informal survey already shows a solid trend: no movie is ever played at 7 anymore, 5 is standard.

Commercials and trailers are routinely played back at 3.5, maximum 4. A check of the playlist notes of arthouse Studio K in Amsterdam reveals playback levels for the main movie of between 4.2 and 5.

The operator of arthouse Louis Hartlooper in Utrecht tells me that every Thursday various parts of all movies are viewed in their cinema (this is much easier with DCP than 35mm). Even when movies move to a new cinema room, they are viewed again. The optimum level is set by ear and programmed into the DCP server. Almost always that level is between 4 and 5. Another arthouse in Utrecht, ‘t Hoogt, also previews every movie on Thursday’s. On average they end up at 5.5, with 4.5 being the softest. Once in a while, they come across a movie that can be played at 6.3. Their goal is that soft sounds should be audible, loud scenes not too loud. They want to avoid complaints from the audience.

The level varies, but many movies are projected at 4, the maximum after one year of operation is 5.4.

“I always visit at least ten cinemas when my movie is out. In the past I always mastered at 7. But these days projections have a maximum at 6, more usual 5.5, sometimes even 4.7. This is mainly caused by audience complaints about loud movies. I have surrendered and now work at 5.5 myself.”

In my opinion, it would make sense to limit the short-term (3 secs) exposure to 100 dBA. That would be a max S (short-term) of approximately -6 LUFS.”

ProTools Editing videos:

Edit Audio for film in ProTools:

Link 1: https://youtu.be/ksiKKmgJpkI

Link 2: https://youtu.be/GNMH_YX_tq4

web_FoleyArtists2_Site
foley


1-Studio

How to Record Foley like a PRO (4 Steps)

Ale Fito POSTPRODUCTION , , , Leave a Comment on How to Record Foley like a PRO (4 Steps)

How to Record Foley like a PRO (4 Steps) First of all if you don’t remember what foley was and you need to take a peek, do it here. In here I cover what foley is and where in the process of audio post-production lies exactly. Well, let’s suppose you are about to begin the […]


PrettyLIghts

Post-Production Audio: What ORDER to follow? (Step by Step Guide)​

Ale Fito POSTPRODUCTION , , , Leave a Comment on Post-Production Audio: What ORDER to follow? (Step by Step Guide)​

Post-Production Audio: What ORDER to follow? (Step by Step Guide) One of the most important things when planifying the post process of a feature film is what ORDER is the most efficient to follow of them all. In here we will talk about which is the most common order for audio post-production: Dialogue editing ADR […]


premiere-audio-screen

Sync Dialogue in Premiere Pro and export AAF to Pro Tools (3 STEPS)

Ale Fito POSTPRODUCTION , Leave a Comment on Sync Dialogue in Premiere Pro and export AAF to Pro Tools (3 STEPS)

Sync Dialogue in Premiere Pro and export AAF to Pro Tools (3 STEPS) The key question here is: You have finished shooting your short, documentary or feature film and you have as well already edited your film but only the visual part (if this is the way you come around it). Now you would like […]


ProTools_Overview_Main

ProTools Editing Principles for Filmmaking

Ale Fito POSTPRODUCTION , , Leave a Comment on ProTools Editing Principles for Filmmaking

ProTools Editing Principles for Filmmaking Pro Tools 12.5 Here I leave you a list of the key principles you will use when editing and mixing sound for film, therefore and without further delay here it is…  Quick Steps when Creating a New Session: Step 1: NAME THE TRACK (SET A MASTER FADER FIRST WHEN CREATING […]


deadpool

Edit your feature film in ONE vs SEVERAL Premiere Pro projects

Ale Fito POSTPRODUCTION Leave a Comment on Edit your feature film in ONE vs SEVERAL Premiere Pro projects

Edit your feature film in ONE vs SEVERAL Premiere Pro projects When it comes to editing a YouTube video it’s clear. You would do only one Premiere project where you would edit the whole thing as it is a 10 minute video. But what if that video wasn’t a YouTube video and instead it was […]


image-w1280

Why the Director Should Be the Editor of the Film

Ale Fito POSTPRODUCTION Leave a Comment on Why the Director Should Be the Editor of the Film

Why the Director Should Be the Editor of the Film Sean Baker. The Florida Project. David Lean. In which we serve. A passage to India (Oscar nomination for editing) David Lynch (2 features). Eraserhead. Inland empire. Shane Carruth (2 features). Primer. Upstream Color. The Coen Brothers (14 features). They have edited all of their films […]